 In our present day society, most things are done for us. We go to stores
to purchase our clothing, food, cars and much more. Our houses are built
for us. Perhaps, it would be nice to experience a lit bit of the days of
old. This could be done by collecting the hair that you brush off of your
dog, spinning it and making it into useable clothing.
In our present day society, most things are done for us. We go to stores
to purchase our clothing, food, cars and much more. Our houses are built
for us. Perhaps, it would be nice to experience a lit bit of the days of
old. This could be done by collecting the hair that you brush off of your
dog, spinning it and making it into useable clothing.
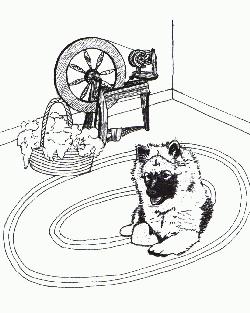
Presented here is a challenge for dog owners. Dogs with longer, double coats have an advantage over the shorter, single coated variety, since it is easier to spin longer, softer strands together. In collecting the hair, you want to save only the soft, undercoat located around the neck, on the sides and topline of the animal. The hair from the other areas is often too short, dry or stained.
You will want to pack as much hair into the brush as possible, and then carefully remove it in one lump and store it in a PAPER bag. The best time to be collecting the hair, is at the beginning of the period when the dog is beginning to blow its coat. Once the guard hairs begin to come out you should begin using a different bag in which to store the hair. The reason for this is that the undercoat, when made into garments is soft and comfortable to wear. Once the guard hairs are spun in, the yarn becomes itchy. It is then better used for weaving, rugs, wall hangings, or the like. Once you have saved about a grocery bag full of hair, then it is time to think about spinning it.
You must first purchase a spinning wheel. I prefer the Ashford wheel which is made in New Zealand. It is helpful, at this time, to join a Spinners and Weavers Guild, if there is one in your area. Spinning classes can be very useful -- if for no other reason than to give you the incentive to practice. It took me some time to figure out how to use my spinning wheel. Trying to co-ordinate my hands and feet was not as easy as I figured it would be, but once I did, it was a snap. The yarn that I originally produced was fat and lumpy. Looking back on it, it was beautiful novelty yarn which I couldn't make again even if I tried.
Following are the steps to successful spinning:
1. If you want your finished garments to be uniform in colour take your hair, spread it out and begin sorting by colour, length and texture. You will be surprised at the variation in colour you will get from one dog. If you don't mind the mottled look with bands of colour, then colour sorting is not necessary.
2. DO NOT WASH the hair until after it has been spun. You do not want to get the hair matted and the natural oil in the hair is helpful when it comes to spinning.
 3. (These instructions are for a right handed person. If you are left handed,
simply reverse the directions.) While spinning, the trick is to keep all of the twist,
in the hair, in front of your left hand (See illustration - Point A) and draw or pull
it out with your right hand (Illustration - point B) to the required thickness. If
the twist gets behind your left hand, it becomes very difficult to draw the hair back,
and you will end up with very uneven yarn.
3. (These instructions are for a right handed person. If you are left handed,
simply reverse the directions.) While spinning, the trick is to keep all of the twist,
in the hair, in front of your left hand (See illustration - Point A) and draw or pull
it out with your right hand (Illustration - point B) to the required thickness. If
the twist gets behind your left hand, it becomes very difficult to draw the hair back,
and you will end up with very uneven yarn.
4. The order I use is: Draw back with the right hand; allow the twist to form by pulling back with the left hand; draw back again with the right hand; pull back with the left, and finally, feed the yarn into the orifice to wind onto the bobbin. In summary -- right, left, right, left, feed in and start again. This needs to be done rather quickly whilst you are pedaling slowly and smoothly with your right foot.
5. At the beginning, you may need to have another person around to start the wheel turning for you when it stops or begins to rotate in the wrong direction.
6. I leave my yarn on the spools for at least 24 hours to set the twist in it.
7. To ply the strands, you may put two or more spools of yarn on a Lazy Kate or you can roll your single strands into balls and put them into jars on the floor. I have found two ply to be quite satisfactory for knitting as 3 ply tends to be too hot. Your single strands are all twisted in one direction and then plied in the opposite direction -- again spun onto a spool on the spinning wheel.
8. I wait another 24 hours and then I take it off of the spool and make a skein by wrapping it around the back of two chairs placed a few inches apart. Tie it off in 3 or 4 places and then slip it off. Holding one end of the loop in one hand and the other end in your other hand, twist it around until it is too tight to twist farther. Feed one end into the other and voila -- you have a skein.
9. Now you can wash your yarn in dog shampoo and warm water. Rinse well and apply a nice smelling hair conditioner to remove any static electricity. Rinse again. Wrap it in a towel and wring it out. Tie a medium size weight onto one end and hang to dry.
10. If you wish to dye the yarn, do so before you put in conditioner. The finer, softer hairs take the dye better than the coarser guard hairs. You can either use standard fabric dyes or natural dyes. There are several good books available on the subject of natural dyes.
When all of this is done you will have the fun of deciding just how to use your beautiful yarn - made with the help of your beloved pet. Your finished product will be soft enough to be knitted into baby's clothing or strong enough to be used for macrami. Hope you have fun.